RPS // Blogs // AI Won’t Replace Designers It’ll Replace Bad Design Execution
AI Won't Replace Designers—It'll Replace Bad Design Execution

AI is disrupting design but not designer demand. Learn why AI struggles with strategy, which designers will thrive, and how to evolve before the market shifts.

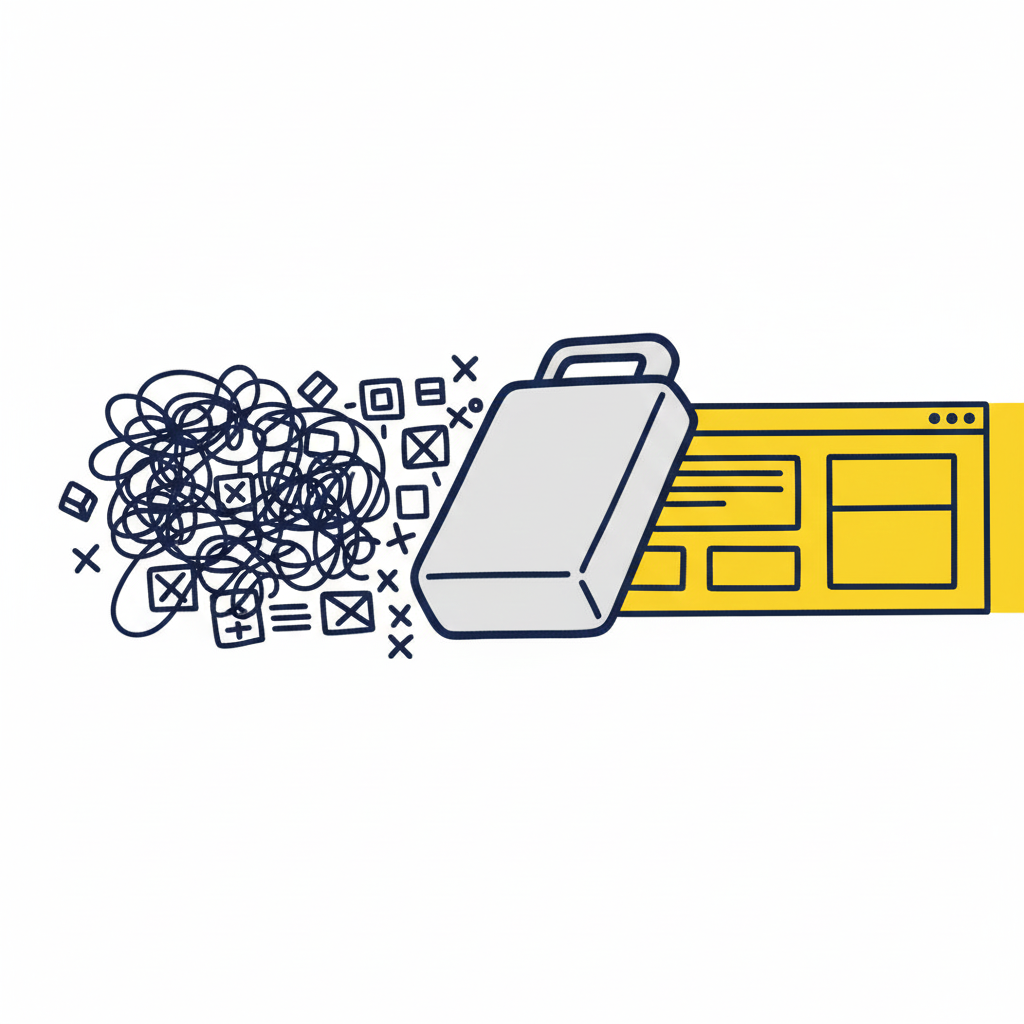
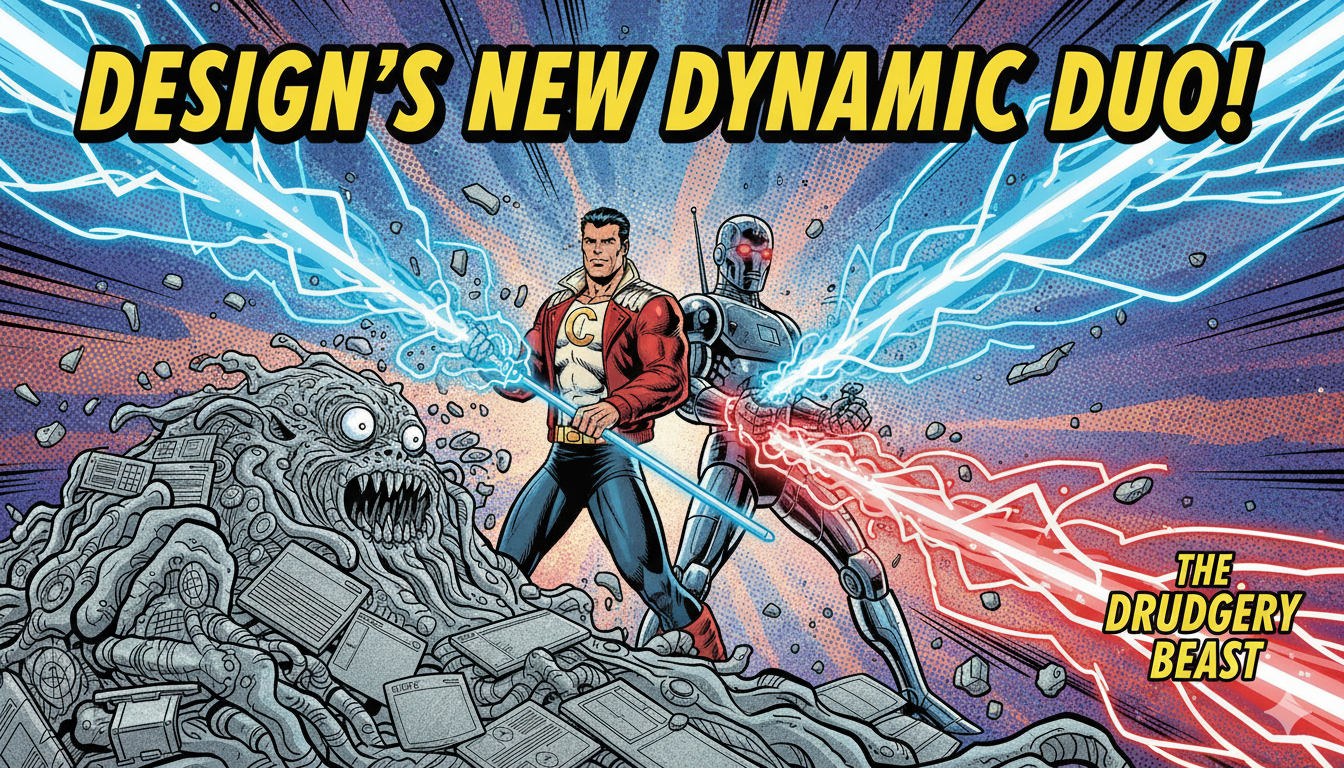
AI-generated design is everywhere. Paste a prompt, get a UI. Seconds instead of weeks. No revisions. No meetings. Naturally, designers are nervous. But here’s the uncomfortable truth that nobody wants to admit: AI isn’t killing designer demand. It’s killing a specific kind of designer. And that kind was already becoming obsolete.

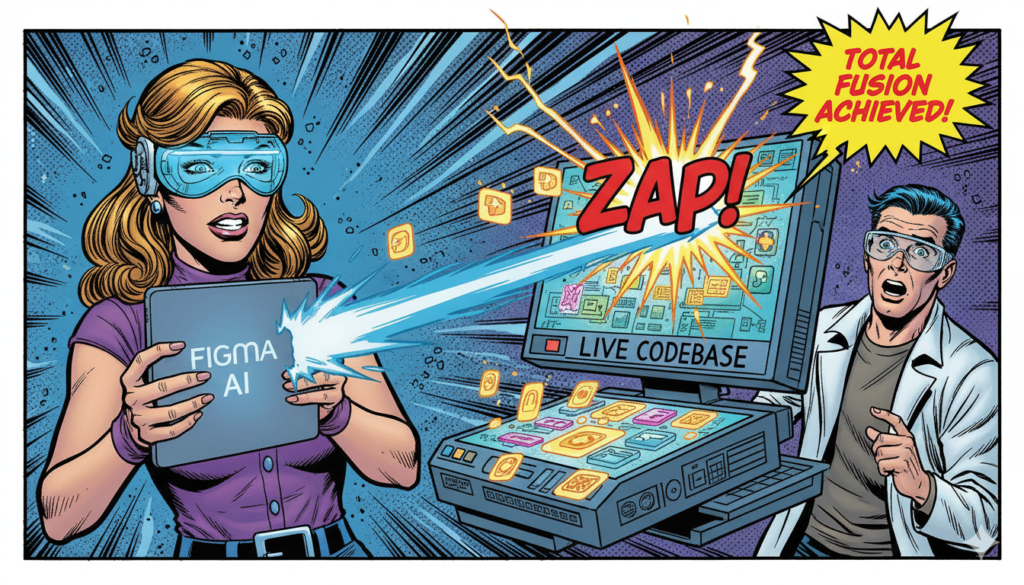
The panic makes sense on the surface. Tools like Midjourney and Figma’s AI features are getting better every month. Generated landing pages look respectable. Dashboard mockups arrive in seconds. For someone whose value proposition is speed and visual execution, this feels existential. But if you zoom out and look at what AI actually does versus what design actually requires, the picture gets much more interesting—and much more hopeful for designers who understand the difference.
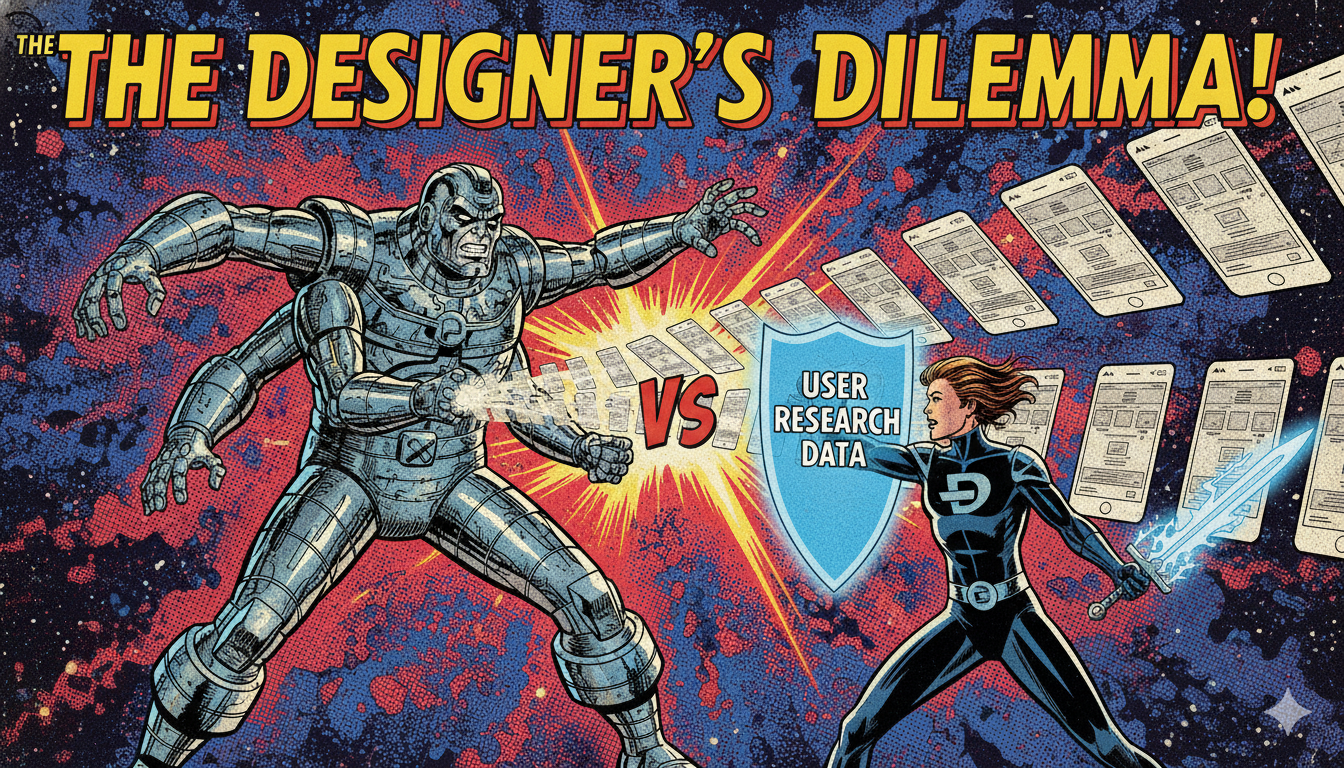
What AI Can Actually Do (And Where It Stops Dead)

Today’s AI tools are impressively good at generating basic UI patterns. Landing pages? AI handles them beautifully. Marketing sites with proven conversion patterns? AI nails them. Simple dashboards with standard layouts? AI produces them faster than you can set up your Figma file. Given a halfway decent prompt, AI can produce something visually acceptable—sometimes even genuinely impressive.

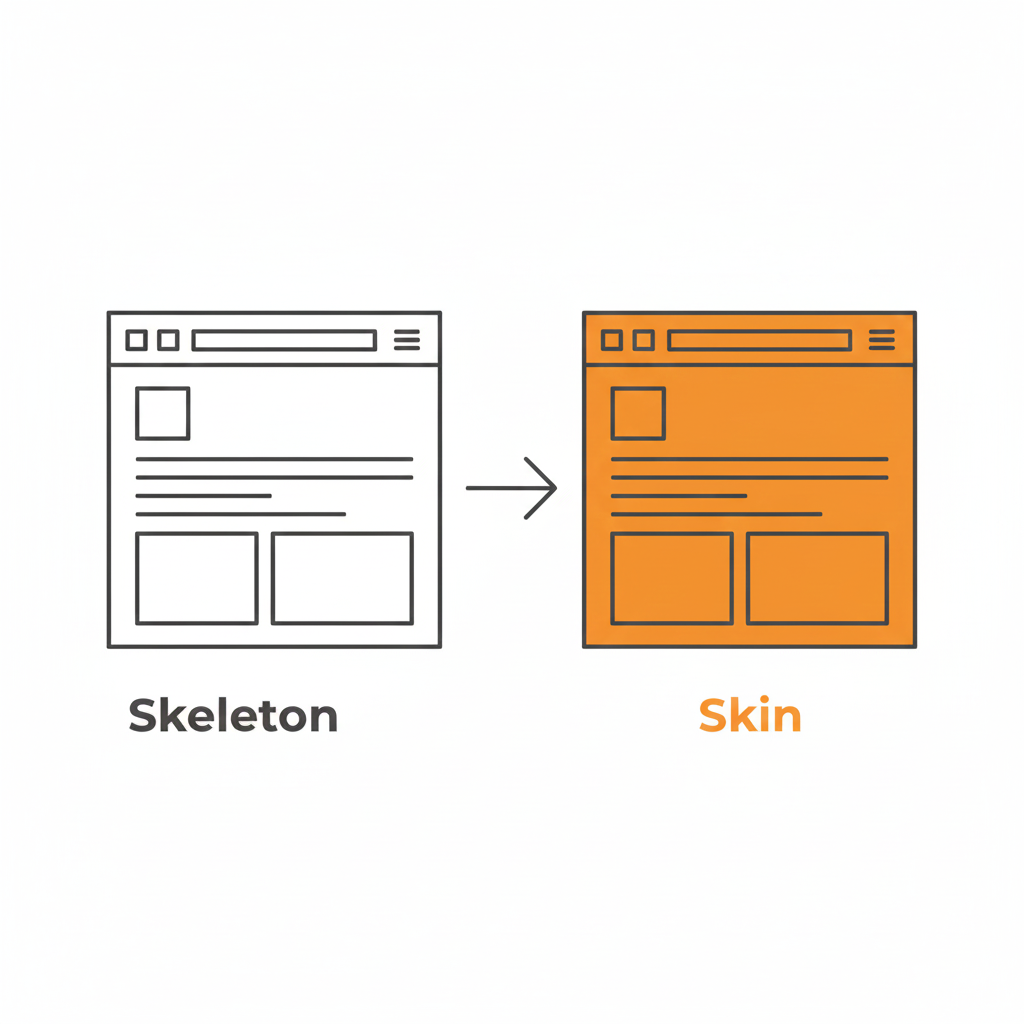
But here’s where it breaks: acceptable isn’t the same as effective. AI can assemble components. It can remix patterns. It can imitate style flawlessly. What it cannot do is understand why a product exists in the first place. It doesn’t know the user problem that matters most. It doesn’t understand the business trade-off between feature completeness and cognitive load. It has no idea about regulatory constraints, internal politics, or long-term product vision. Design is fundamentally decision-making under constraint, and AI has no stake in the outcome. It can generate options, but it can’t weight them.

The Real Pattern: AI Is Commoditizing Commodity Design


The real threat isn’t to “designers” as a whole. The threat is to commoditized design. If your value is pushing pixels, executing instructions without questioning them, or delivering visuals without understanding context, AI will undercut you—fast. Take simple brochure websites. AI handles these perfectly. Many clients don’t need more than that. Those jobs will disappear. And honestly? They probably should. The market doesn’t need thousands of junior designers executing mid-level pixel-pushing work at human salaries when AI can do it cheaper.

But now look at complex SaaS products. Multi-step onboarding flows. Permission-based dashboards that change based on user role. Edge cases. Conflicting user goals where you have to choose which one matters more. AI struggles here because complexity isn’t visual—it’s conceptual. We’ve tested AI-generated flows for enterprise tools. They look visually fine until you actually try to use them. Then everything breaks: wrong prioritization, missing states, no understanding of user anxiety or risk tolerance. AI doesn’t fail loudly. It fails subtly. And subtle failures—the kind that make power users frustrated or new users confused—those are expensive. They cost retention. They cost support tickets. They cost revenue.

The Shift: From Delivery to Decision-Making

Designers who survive the AI era won’t be the fastest executors. They’ll be the best decision-makers. The role evolves from “here’s the design” to “here’s why this is the right design, given what we know about users, constraints, and trade-offs.” That requires skills AI doesn’t have: defining the problem before solving it, choosing what not to design, making trade-offs explicit, defending decisions with evidence.

Prompting is a skill—and it’s not obvious. Everyone assumes asking AI for a design is easy. It’s not. Getting useful output requires clear thinking, precise constraints, iterative refinement, and taste. Bad designers get bad AI output faster. Good designers get leverage. The real opportunity is having AI handle repetitive layouts, variations, exploration, and documentation—freeing designers to focus on strategy, user research, system thinking, and business alignment.

The Timeline and the Middle Layer


Over the next 3–5 years, AI will start replacing mid-level execution-heavy design roles. Not senior strategists who shape product vision. Not junior learners soaking up fundamentals. The middle—designers who were competent executors but didn’t develop deeper judgment. Designers who adapt now—learning AI tools, sharpening judgment, owning decisions—will win disproportionally.

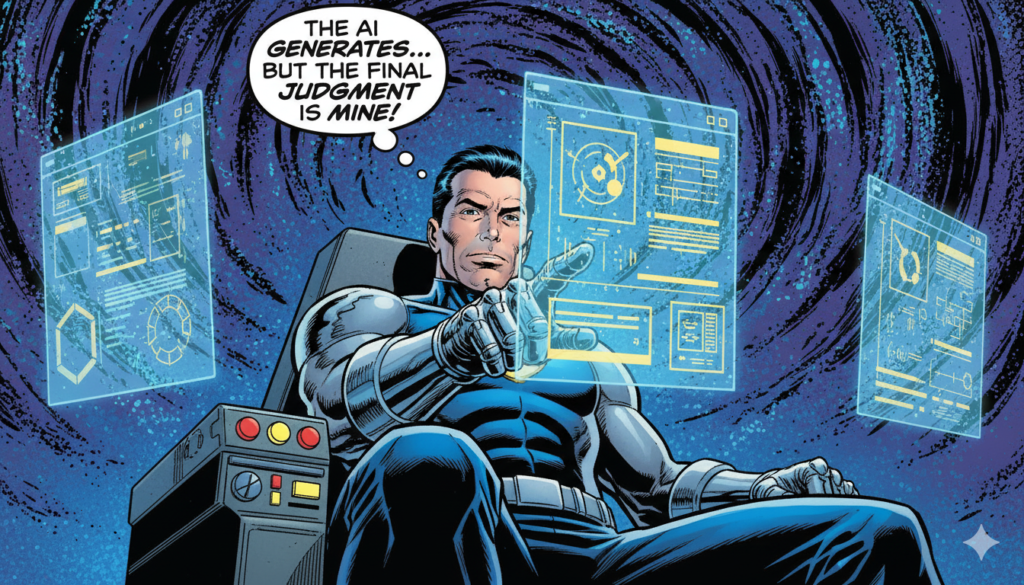
AI won’t replace designers. It will replace designers who mistake output for value. The future belongs to designers who decide—not just deliver.

Also Read: Mobile First Design Myth: Why It Excludes Billions & What to Do Instead

RPS // Blogs // Mobile First Design Myth: Why It Excludes Billions & What to Do Instead
Mobile First Design Myth: Why It Excludes Billions & What to Do Instead

Mobile first” design assumes privilege most users don’t have. Learn why low-bandwidth design matters more and how to build for global users, not just Western smartphones.

Mobile first” is treated as gospel in product design. But beneath its good intentions lies an uncomfortable truth: Mobile first assumes privilege. It assumes reliable internet. It assumes smartphones. It assumes abundant data. For billions of people, those assumptions don’t hold. And when we design without acknowledging that, we’re building products that exclude the very users mobile was supposed to include.

The Hidden Assumption: Mobile = Smartphone

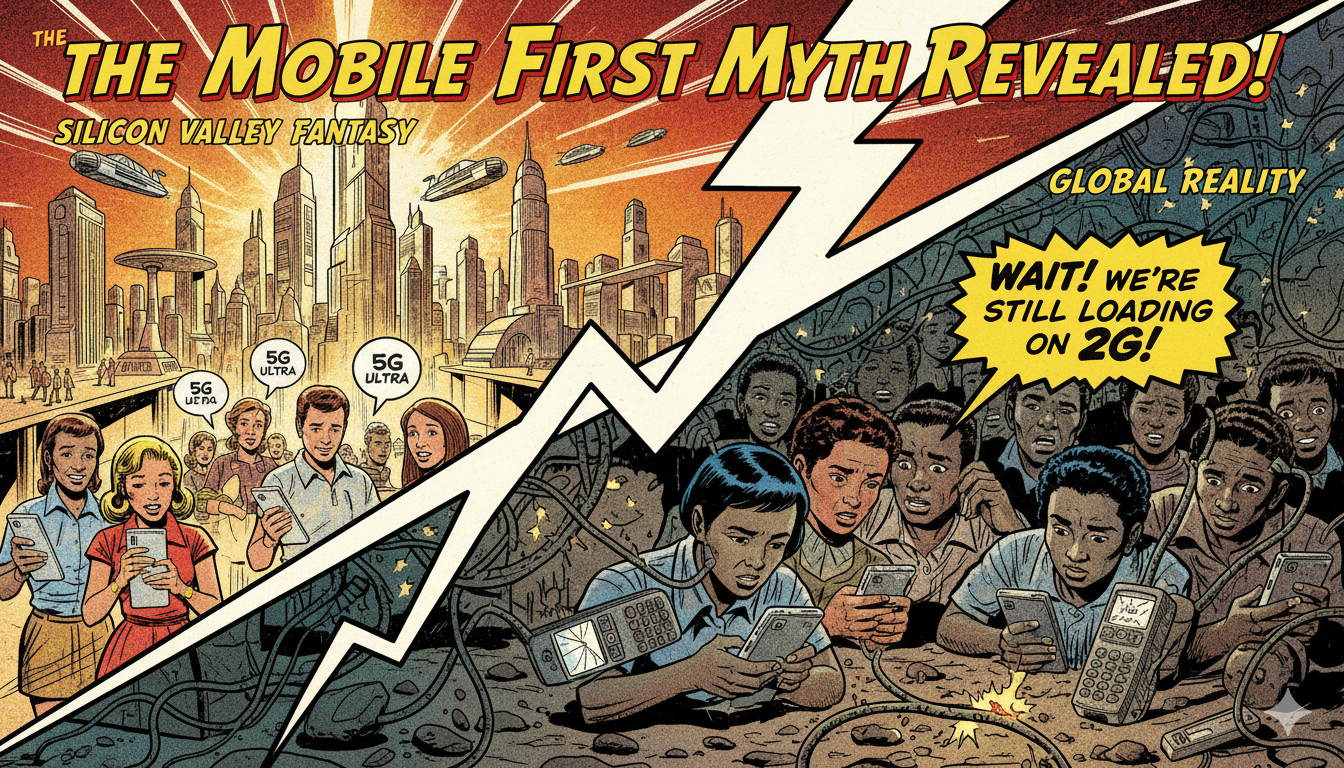
When designers say “mobile,” they usually mean iPhones, Android smartphones, touchscreens, and app ecosystems. But globally, 1.1 billion people still use 2G networks. Many experience intermittent access. Data is expensive and rationed. A design optimized for 4G collapses entirely on 2G. A beautiful responsive website that relies on JavaScript becomes unusable when bandwidth is measured in kilobytes per second.

This isn’t a theoretical problem. It’s a global scale problem. According to research on low-bandwidth design, users on slower connections face dramatically different experiences than their high-speed counterparts—and our designs rarely account for that reality. Modern responsive sites rely heavily on JavaScript, animations, and third-party scripts. While this looks great on fast connections, it’s devastating on slow ones. Heavy JavaScript bundles mean long load times, broken interactions, and abandoned sessions.

Responsive Design Becomes a Liability

In low-bandwidth contexts, responsive design isn’t inclusive—it’s hostile. Pages that take 40+ seconds to load aren’t “responsive.” They’re broken. Media that fails to render isn’t “progressive enhancement.” It’s frustration. Forms that time out aren’t “user-friendly.” They’re barriers.

We experienced this firsthand at Rock Paper Scissors while working with an NGO delivering educational content across rural South Asia. Their platform followed standard “mobile-first” practices. On paper, it was perfect. In reality, pages took 40+ seconds to load, media failed to render, and forms timed out. We tested on a 2G simulator. The site was unusable.
The Real Paradigm Shift: Low-Bandwidth First

We flipped the paradigm entirely. Instead of “mobile first,” we designed low-bandwidth first. Text-only core experience. No JavaScript dependencies. Images loaded only on request. Forms built for failure tolerance. The result? Load times under 5 seconds on 2G. Three times increase in session completion. Dramatically lower bounce rates. Only after this base worked did we enhance for higher-bandwidth users.

Research confirms this approach: designing for the slowest network first, then scaling up, creates more resilient and truly inclusive digital products. It forces prioritization. It eliminates waste. It respects that not everyone has unlimited data.

Capability Assumptions Are Privilege Too

Modern mobile design assumes access to GPS, cameras, microphones, and background data. For many users, these features are unavailable—or disabled to save data. Designs that require them create invisible barriers. Instagram understood this. That’s why Instagram Lite exists. Meta knows “mobile first” isn’t universal.

The uncomfortable question: Are we designing for humans, or for the 10% of humans with premium connections? Typography, interaction patterns, even design language reflect Western, high-bandwidth realities. That’s privilege encoded in pixels.

Mobile First for Whom?

“Mobile first” for a designer in San Francisco isn’t the same as “mobile first” for a user in rural India. The constraints are different. The devices are different. The networks are different. Yet we apply the same design frameworks globally, ignoring the fact that most of the world’s internet users experience fundamentally different conditions than our design environments simulate.

The Real Solution: Constraint-First Design

The future isn’t mobile-first. It’s constraint-first. Design for the slowest network. Design for the weakest device. Design for the least capability. Then scale up, not down. This approach creates products that work everywhere—not products that are optimized for Western conditions and “degrade gracefully” for everyone else.

Mobile-first design was a step forward. But it’s no longer enough. If we want truly inclusive digital products, we must design for reality, not assumption. And reality—for most of the world—is low-bandwidth.

Also Read:

RPS // Blogs // Amazon One-Click Checkout: The UX Case Study That Revolutionized E-Commerce
Amazon One-Click Checkout: The UX Case Study That Revolutionized E-Commerce

Learn how Amazon’s 1-click checkout increased conversions by 300% and reduced cart abandonment. The UX design principles behind $738B in e-commerce.

In 1999, Amazon filed a patent for something that sounds impossibly simple: letting customers buy something with a single click. Today, “One-Click Checkout” sits alongside the iPhone and Post-it Notes as one of those inventions so intuitive we forget what shopping was like before it existed. Yet when Amazon introduced this feature, it was genuinely revolutionary. The average e-commerce checkout required customers to navigate through 4–5 separate steps: cart review, account login, address entry, payment details, and order confirmation. Each step was a decision point. Each decision point was an opportunity for buyers to reconsider, procrastinate, or abandon altogether.

The problem wasn’t complexity—it was friction. Even highly motivated customers faced friction from decision fatigue. Enter a shipping address. Enter a billing address (sometimes different). Enter credit card details. Verify everything. Confirm the order. By the time checkout completed, the psychological momentum that drove the initial purchase had dissipated. Mobile shopping made this even worse. Typing a 16-digit credit card number on a three-inch screen felt so cumbersome that many shoppers simply abandoned their carts rather than complete the transaction.

Amazon Checkout UX Design Case Study — EMILY PAK

Amazon’s data revealed something striking: checkout cart abandonment rates hovered around 70% across the e-commerce industry. Worse, roughly 18% of shoppers abandoned carts specifically because the checkout process felt too complicated or time-consuming. This represented catastrophic revenue leakage. Industry analysis suggested that e-commerce stores could recover an estimated $260 billion in lost orders simply by optimizing the checkout experience. The mathematical incentive was undeniable, but the design challenge was equally clear: how do you remove friction without compromising security or data collection?

One-Click Checkout solved this through a progressive disclosure strategy. Instead of asking for all information upfront, Amazon securely stored customer payment and shipping details. On subsequent visits, users could complete a purchase with literally one click. The cognitive load dropped from “fill five forms” to “confirm one decision.” This wasn’t about removing information requirements—it was about removing the moment of friction at the point of impulse buying. When users decided they wanted something, they could act on that decision instantly, before motivation faded or distractions intervened.

The results were staggering. Amazon’s conversion rates jumped from approximately 2.5% to over 10%—a 300% relative increase. Cart abandonment rates plummeted by 40–45%, meaning 40% more people who started the checkout process actually completed it. Average order value increased by 5.3%, and behavioral data showed that One-Click customers visited 7% more frequently and spent 7.8% more time browsing per session over 15-month periods. More pages per session—9.3% more, to be precise—suggested that removing checkout friction freed customers to explore more products rather than rush through the purchase experience.

Competing research corroborated Amazon’s findings. Studies by the Baymard Institute indicated that optimizing checkout alone could boost conversion rates by up to 35%. Later implementations like Apple Pay demonstrated similar patterns: when HotelTonight integrated one-click payment, they saw a 26% immediate increase in orders. Shop Pay, Shopify’s one-click solution, reported 70% faster checkout times and conversion rates 1.72 times higher than traditional multi-step flows. These weren’t isolated success stories—they were consistent validation of a principle: friction correlates directly to abandonment.

What made Amazon’s approach sophisticated wasn’t the technology—it was the psychological insight. Friction isn’t just a feature problem; it’s a behavior problem. Humans experience decision fatigue. Each form field, each validation step, each page load depletes mental resources. By the time customers reach payment, they’re mentally exhausted and vulnerable to second thoughts. One-Click didn’t just save time; it preserved the psychological state that motivated the initial purchase. The customer remained in a state of desire and action, uninterrupted by procedural complexity.

The design also understood security perception. Many users worried that storing payment information online was risky. Amazon addressed this through explicit security messaging, encryption transparency, and brand reputation. The UX communicated that their security was strong enough that you could trust instant payments. This was crucial because removing friction can only succeed if users feel safe. Security concerns still matter—they’re just addressed through design communication, not by adding more form fields.

Mobile optimization became critical as shopping shifted to phones. One-Click’s convenience became exponentially more valuable on mobile devices where typing and navigation felt clunky. Rather than design a separate “mobile checkout,” Amazon recognized that the frictionless principle applied universally. Whether desktop or phone, the goal remained identical: minimize steps between desire and transaction completion. This consistency across devices reinforced One-Click’s value proposition and built user habit.

The business impact extended beyond immediate revenue. One-Click created switching costs that benefited Amazon for decades. Customers stored payment information on Amazon, making it easier to buy from Amazon again than from competitors who required re-entering all information. This small UX advantage compounded over time into massive competitive moat. New competitors couldn’t instantly match Amazon’s frictionless experience because customers had already invested in the convenience of One-Click.

The core takeaway isn’t that you should copy One-Click—it’s that you should map your checkout for friction. Where do users hesitate? Where do they reconsider? Where do form fields outnumber motivation? Those are your design opportunities. Amazon proved that removing even tiny friction points accumulates into massive business impact. The difference between a 2.5% and 10% conversion rate isn’t the result of flashy design; it’s the product of systematic friction reduction at every touchpoint. That’s how a simple checkout feature became one of the most valuable innovations in e-commerce history.

Also Read: Airbnb UX Design Case Study: Building Trust in Peer-to-Peer Travel

RPS // Blogs // Airbnb UX Design Case Study: Building Trust in Peer-to-Peer Travel
Airbnb UX Design Case Study: Building Trust in Peer-to-Peer Travel

Discover how Airbnb’s user-centered design solved trust barriers and scaled to 4M+ hosts. Learn the UX principles behind their $100B+ valuation.

When Airbnb launched in 2008, they faced an almost impossible challenge: convincing millions of people to stay in strangers’ homes. The psychological barrier wasn’t just about logistics—it was about overcoming deep-rooted fear and skepticism. The peer-to-peer accommodation concept seemed risky, even unsafe. Hosts questioned whether guests would respect their spaces, while travelers worried about scams, safety, and whether photos matched reality. Airbnb didn’t win the market through aggressive marketing or competitive pricing alone. They won it through intentional, human-centered design that systematically dismantled every friction point in the user journey.

The core problem Airbnb identified was this: trust doesn’t exist in a vacuum—it must be designed into the product. Both hosts and guests needed tangible proof of legitimacy before committing. Hosts needed visibility and professional presentation tools, while travelers needed reassurance that their money and safety were protected. Rather than building features in isolation, Airbnb mapped the emotional journey of both user groups and designed interfaces that spoke directly to their fears.

Airbnb Travel App UI Design by Alomgir Hossen on Dribbble

The breakthrough came through a deceptively simple mechanism: two-way reviews and verified profiles. But the genius wasn’t in the concept—it was in the execution. Airbnb didn’t just add a review button; they embedded trust signals throughout the entire interface, making reputation visible at every decision-making moment. Ratings appeared above the fold on listing pages, filterable and sortable to ease choice anxiety. Review counts carried visual weight equivalent to pricing information, signaling that community feedback was as important as cost. Microinteractions—like highlighting keywords such as “clean,” “friendly host,” and “responsive“—reduced cognitive load and subconsciously reinforced safety during the critical booking moment. This wasn’t decoration; it was strategic psychology embedded in UI.

Booking's vs. Airbnb's Mobile Homepage UI | GoodUI Blog
Booking’s vs. Airbnb’s Mobile Homepage UI | GoodUI Blog

To address the visual trust barrier, Airbnb invested heavily in professional photography. They recognized that most hosts lacked professional equipment or skills to showcase their spaces effectively. Instead of assuming hosts would solve this problem themselves, Airbnb launched a free professional photography service. High-quality images didn’t just look better—they fundamentally changed how guests perceived value and reduced booking hesitation. This hands-on approach demonstrated Airbnb’s understanding that not all UX problems can be solved with code. Sometimes the most impactful design decisions happen offline, in real homes, with real people.

The search and filtering experience was engineered for cognitive ease. Rather than overwhelming users with hundreds of parameters, Airbnb grouped filters contextually: location, price range, amenities, and experience type. They added an interactive map feature that allowed users to think geographically rather than scrolling through endless lists. Each listing card prioritized information hierarchy—stunning photos, transparent pricing, review highlights, and instant booking availability. Users could scan a grid of results and instantly identify matches. This wasn’t beautiful design for beauty’s sake; it was friction-reduction through clarity.

Airbnb A/B Tests More Filters On Their Listing Screens With

The booking flow itself became a masterclass in reducing abandonment. Airbnb introduced Instant Book, eliminating the approval step that created uncertainty and delayed gratification. Pricing transparency went further than competitors: Airbnb displayed total costs upfront, including service fees and taxes, removing the shock factor that triggers checkout abandonment. In-app messaging enabled direct communication between hosts and guests, reducing the risk of miscommunication and building rapport before arrival. Each touchpoint was designed to reinforce the narrative that you’re not dealing with a faceless corporation—you’re connecting with a real person in a real home.

The impact speaks for itself. By 2023, Airbnb scaled to over 4 million hosts and 1.4 billion guest arrivals, achieving a valuation exceeding $100 billion. More importantly, the company maintained a 4.3-star app rating across more than 138,000 reviews, a testament to consistent, thoughtful experience design. This wasn’t achieved through a single feature launch but through systematic, user-centered iteration that treated trust-building as a design problem, not a marketing challenge.

The UX lesson here is fundamental: When your product requires users to overcome psychological barriers, design must address emotion before function. Airbnb didn’t just create a platform to list homes; they created a system of reciprocal accountability, transparency, and human connection. They understood that reviews weren’t social proof—they were psychological scaffolding that made the leap from “I’d never trust a stranger” to “I’m excited to meet this person.” That’s the difference between a good product and a transformational one.

Also Read: How to Implement AI as a Design Collaborator in 2026: A Practical Guide for UX/UI Teams

RPS // Blogs // Why 1/60th Onboarding Time Helps Startups Win
Why 1/60th Onboarding Time Helps Startups Win

Speed is survival.

Startups don’t have patience for slow systems. They move fast because they have to and every day without traction is a day closer to their cash runway drying up. This is why 1/60th onboarding time fits their reality perfectly. When you can condense what traditionally takes days or weeks into a fraction of that time, you’re speaking the language of founders who measure success in pivots, not presentations. Research shows that within the first 90 days of a client relationship, trust either builds or erodes completely and for startups operating on tight timelines, this compressed onboarding period is where momentum gets established.

Startups Value Speed Over Perfection

Founders want momentum. They want visible movement. Long onboarding feels like friction, a necessary evil that delays their ability to test assumptions and gather market feedback. The psychological weight of waiting extends beyond just time; it creates doubt. If an agency takes three weeks to get started, what message does that send? That they’re overwhelmed. That they’re not aligned with startup culture. That they might not move fast when problems arise.

Question: “How quickly can you typically start working on our project?”
Answer: “We’re built for startup velocity. Most projects move from signed contract to tangible work within 48 hours. We use guided intake forms instead of endless discovery meetings, meaning we ask the right questions once, in a structured format, and move forward. This isn’t rushing, it’s respecting that your runway is finite and your window of opportunity isn’t negotiable.

Agencies that onboard quickly feel aligned with startup culture. Those that don’t feel risky. In a study by research firm Bain & Company, customers are four times more likely to switch if the problem is service-related rather than price or product-related. This means your onboarding isn’t just about logistics—it’s about demonstrating you understand the startup ecosystem.

Faster Onboarding Means Faster Validation

When projects start immediately, startups can test ideas sooner. Landing pages go live faster. Ad campaigns launch on schedule. Customer feedback comes in before assumptions harden into certainty. That speed can be the difference between pivoting early (while capital and founder energy remain high) or failing late (when options have narrowed).

The metric that matters most to startups is Time to Value (TTV)—how long until they see tangible results. Research on customer onboarding shows that reducing TTV directly correlates with satisfaction, retention, and the likelihood of contract renewal. For a startup, TTV isn’t just a metric; it’s existential. If you can cut their path to first meaningful result in half, you’re not just improving efficiency—you’re extending their viability window.

Question: “What can we realistically expect to see in the first month?”
Answer: “By week one, you’ll have your first deliverable—whether that’s a wireframe, campaign draft, or strategy document. By week two, we move into revision cycles based on real feedback, not theoretical improvements. By month’s end, you have something launch-ready. This isn’t a prototype or a concept; it’s a foundation for real market testing. We see startups use these early wins to inform their next sprint of development or to generate the social proof they need for their next funding conversation.

Trust Is Built Through Action

Startups judge partners by execution, not promises. A beautifully designed proposal doesn’t matter if the partner takes two months to deliver on it. 1/60th onboarding time proves you can act decisively. That’s currency in early-stage business. When a startup founder sees that you’ve collected the information they need, synthesized it, and produced meaningful output within 48 hours, something shifts. Trust moves from theoretical to concrete. They’ve seen proof, not potential.

This ties directly to research on early wins in organizational change. Securing visible momentum in the first 90 days builds psychological momentum that carries teams forward. For a startup, this isn’t about bells and whistles—it’s about proof that the partnership is worth their limited attention and capital.

Why Startups Stick Around

Agencies that respect speed often become long-term partners. Startups grow, budgets increase, and the relationship deepens. But the foundation for that long-term relationship is set in those first two weeks. A startup that experiences quick onboarding begins their relationship with your agency already in motion. They don’t start thinking “will this work?” They start thinking “how do we scale this?”

Question: “What happens after the initial onboarding phase?”
Answer: “Onboarding creates the ramp. The real relationship is built on what happens next—responsiveness, quality, and continued alignment. Startups we work with often extend engagements because we’ve proven we can move at their speed without sacrificing quality. We’ve also built systems where communication stays efficient; there’s no administrative bloat. Every touchpoint is intentional. As you grow, we scale with you, but the operational principles stay the same.

Fast onboarding isn’t a shortcut. It’s a signal that you understand how startups survive and how their decision-making works. It tells them you’ve optimized for their reality, not for a generic client journey. In a market where trust is built over weeks rather than months, that signal carries enormous weight.

Also Read: What 1/60th Onboarding Time Really Means

RPS // Blogs // What 1/60th Onboarding Time Really Means
What 1/60th Onboarding Time Really Means

Most creative agencies use vague language when describing their onboarding process. “Fast.” “Efficient.” “Streamlined.

These words mean nothing. A client has no way to measure them.

1/60th onboarding time is different. It’s specific. It’s measurable. And it changes how agencies operate from day one.

Understanding 1/60th: The Math Behind the Concept
The name comes from a simple formula: reduce onboarding to 1/60th of traditional time.

If traditional onboarding takes 30 days, 1/60th equals 12 hours.
If traditional onboarding takes 60 hours, 1/60th equals 1 hour.
If traditional onboarding takes 2 weeks, 1/60th equals 3-4 hours.

This isn’t arbitrary. Real agencies using this model report that 1/60th of traditional onboarding time delivers 80-90% of the information they actually need to begin work.

The remaining 10-20% of questions? They emerge naturally during the project.

Real Example: Traditional vs. 1/60th Model

Traditional agency onboarding:

Day 1: Initial kickoff call (90 minutes) → 40-page onboarding document sent

Days 2-3: Client reviews document, returns with questions

Days 4-5: Calls to clarify questions

Days 6-10: Back and forth emails on specifics

Day 11: Finally, project actually begins

Total: 10 calendar days, 5-6 working days, multiple meetings

1/60th model:

Hour 1: Client completes structured intake form (15 minutes)

Hour 2: Designer reviews submission (15 minutes), asks clarifying questions via system

Hour 3: Client answers clarifications (15 minutes)

Hour 4: Team begins work with clear direction

Total: 4 hours, all within one day, one framework

Where Traditional Onboarding Breaks Down
The problem isn’t paperwork itself. The problem is inefficient paperwork.

Friction Point 1: Information Overload on Day One

Traditional agencies send 40-page onboarding documents hoping clients will fill out all sections completely.

Reality: Clients skim. They miss questions. They answer other questions incorrectly because they don’t understand context.

Example: “Who is your primary audience?” Client writes “Small business owners.” But the team later learns they actually mean “3-5 person companies in financial services in tier-1 cities.”

That’s a massive gap created by poor question design.

Friction Point 2: Repeating Information Multiple Formats

Client fills out onboarding form. Then goes on a kickoff call where the creative director asks the same questions again. Then an email comes with a checklist requesting the same information.

Why? Because different systems, different people, lack of synchronization.

Client frustration: “Didn’t I already answer this?”

Agency frustration: “We need written answers, not verbal.”

Result: Client loses confidence. Agency wastes time reformatting information.

Friction Point 3: Undefined Timeline for Getting Started

Traditional model: Client submits information. Agency says “We’ll review and get back to you.”

Client waits. Days pass. Client worries. Did they send the wrong info? Should they follow up?

Meanwhile, the creative director is busy and hasn’t looked at submission yet.

This delay kills momentum. Excitement from the initial “yes” evaporates.

By day 10 when actual work starts, trust is already fractured.

Real Data: The Cost of Slow Onboarding

Research from agencies implementing 1/60th shows:

Clients who wait 5+ days for feedback have 35% higher revision request rates (they’ve second-guessed their input by then)

Client project cancellation rate drops 22% when onboarding completes same day

Revision rounds decrease 40% when clients see direction within 24 hours

Client satisfaction scores increase 60% when they’re engaged within 4 hours of signup

What Changes With 1/60th Onboarding Speed
Everything becomes intentional instead of comprehensive.

Instead of 40-page forms, agencies use 15-question structured intake.

This isn’t cutting corners. It’s asking smarter questions.

Example comparison:

Traditional: “Tell us about your brand” (open-ended, vague response)

1/60th: “Rate your brand personality on these 5 dimensions [with slider], then upload 3 competitor brands you admire” (specific, directional, comparable)

Instead of long kickoff calls, agencies use guided digital flows.

A 90-minute kickoff call isn’t mandatory. Most of what’s discussed could be structured upfront through guided flows.

In 1/60th model:

Client completes intake (15 minutes)

Designer reviews and creates clarification questions (15 minutes)

Client answers clarifications (15 minutes)

Optional 15-minute call if needed (rarely)

Total: 1 hour instead of 90 minutes. More information collected. Both parties prepared.

Instead of asking “everything just in case,” agencies ask “what we need to begin.”

This is the psychological shift most agencies struggle with.

Traditional thinking: “What if we forget to ask something? Let’s ask everything.”

Result: Forms become so long that clients don’t complete them fully.

1/60th thinking: “What’s the minimum viable information to start producing work? We’ll ask follow-up questions as they naturally emerge.”

Result: Clients complete forms fully. You have what you need. Follow-ups feel natural, not exhausting.

Why Agencies Are Adopting 1/60th Model
The shift toward 1/60th isn’t trend-chasing. It’s responding to how work actually happens now.

Reason 1: Client Expectations Changed

Modern clients don’t tolerate slow processes. They see Figma boards same day. They expect feedback within hours. They’ve seen startups move fast.

An agency that takes 10 days to start work looks outdated.

1/60th model signals that the agency moves at modern speed.

Reason 2: Competitive Advantage

If Agency A takes 10 days to start and Agency B starts in 4 hours, which one looks more competent?

1/60th isn’t just about speed. It’s about perceived competence.

Reason 3: Better Project Outcomes

Counterintuitive truth: Less upfront info collection leads to better projects.

Why? Because forcing clients to answer every possible question leads to decision paralysis. They overthink.

When you ask strategically, clients give clearer answers. They think more clearly.

Clearer input + faster iteration = better final product.

Reason 4: Team Morale Improves

Designers hate vague starts. Unclear briefs lead to multiple revisions. Multiple revisions kill morale.

1/60th forces clarity early. Clarity leads to fewer revisions. Fewer revisions = happier, more productive teams.

Creative directors aren’t answering 50 emails clarifying vague information. They’re designing.

Real Numbers: What Agencies See With 1/60th
Agencies implementing 1/60th model report:

Average project start time: from 10 days to 4 hours (96% reduction)

Revision rounds: from 5-6 rounds to 2-3 rounds (50% reduction)

Client satisfaction scores: from 7.2/10 to 8.9/10

Repeat client rate: from 40% to 68%

Team billable hours increase: 12-15% (less time in unclear discovery)

These numbers come from agencies like Rock Paper Scissors Studio, Octet Design Studio, and others tracking the shift.

The 1/60th Framework: Step by Step
Step 1: Replace forms with guided inputs (Typeform, Airtable, Notion forms)
Step 2: Ask 15 strategic questions instead of 40 comprehensive questions
Step 3: Build in auto-clarification (system asks follow-up questions based on responses)
Step 4: Assign owner immediately (designer reads input within 1 hour)
Step 5: Deliver direction fast (wireframe or mood board within 24 hours)

USER Q&A SECTION

Q: Won’t a 4-hour onboarding miss important information?

A: No. Most “important” information agencies collect isn’t used until later in the project. And by then, clients have told you more through feedback. The 4-hour core gets 90% of what you need. The remaining 10% emerges naturally. Traditional 10-day onboarding collects information that sits unused.

Q: What if a client doesn’t respond fast? Does the timeline still work?

A: No. 1/60th only works if client engagement matches. But here’s what changes: agencies set clear timelines upfront. “Submit by Friday, we deliver direction Monday.” Clients respond when they have a deadline. When timeline is vague, they procrastinate.

Q: Doesn’t this only work for simple projects?

A: Complex projects benefit most. Clarity on day one prevents 20 hours of back-and-forth later. Simple projects work even faster. The principle applies regardless of complexity.

Q: How do you prevent misalignment if you don’t have long discovery?

A: You build iteration into timeline. First deliverable is intentionally “direction check” not “final design.” Client gives feedback. You adjust. This rapid iteration prevents misalignment better than lengthy upfront planning.

Q: What tools enable 1/60th onboarding?

A: Figma (for quick mockups), Airtable (for structured forms), Loom (for guided walkthroughs), and project management tools like Monday or Linear. The tools matter less than the process. The process matters most.

Also Read: The “Pretty Portfolio” Trap: Why Founders Hire the Wrong Designers

RPS // Blogs // The “Pretty Portfolio” Trap: Why Founders Hire the Wrong Designers
A founder wearing a hoodie, standing at a crossroads with two doors in front of him. Door A is shiny and glowing with squiggly, abstract shapes and stars above it, but there’s a small sign that says ‘Dead End’. Door B is a plain wooden door with a simple blueprint drawing on it, glowing softly and showing a bright path leading to a small doodle city skyline. The founder looks thoughtful, scratching his head. Clean white background, thin black lines, soft pastel accent colors (blue, yellow, orange). Minimalist doodle style, flat 2D composition.”

Most founders are visionaries. They can see the future of their industry, but they often struggle to “see” the difference between a designer who makes things look good and a designer who makes things work.

If you are a founder who doesn’t come from a design background, you likely make decisions based on your eyes. You look at a portfolio, see a sleek, dark-mode dashboard, and think, “This is the person I need.”

But that is exactly how you hire the wrong designer. In the world of UX design hiring, aesthetics are the baseline strategy is the differentiator.

The Mistake: Hiring for Taste, Not Process

The biggest mistake founders make is evaluating a designer based on their “taste.” Taste is subjective. What looks “cool” to you might be a nightmare for your actual users.

When you hire for aesthetics alone, you are hiring a digital decorator. But what your startup needs is a product designer. A product designer doesn’t just ask, “What color should this be?” They ask, “Why does this button exist in the first place?”

The Right Process: Research → Iterate → Measure → Refine.
The Wrong Process: The designer says, “Trust me, I have a feeling this will look great.”

Red Flags: The “Auteur” vs. The Problem Solver

Watch out for the designer who loves their work more than they love your users.

If a designer gets defensive when you show them negative user feedback, that is a massive red flag. A great designer is a scientist—they want to find the truth, even if it means their first three ideas were wrong.

A common red flag is the “Trust Me” approach. If a designer can’t explain the logic behind a layout using data or psychology, they are guessing. And guessing is expensive for a startup.

The Portfolio Trap: Teams vs. Individuals

Founders often see a portfolio featuring a world-class app like Uber or Airbnb and assume the candidate “built” it.

In reality, those apps are built by teams of 50+ designers. The candidate might have only worked on the “Forgot Password” flow. When hiring a UI designer, always ask: “What specifically was your role, and what were the constraints?” The best work often comes from designers who have worked on “ugly” but highly successful products because they had to solve real, messy problems.

How to Interview: Ask About Failures, Not Wins

Most designers are prepared to walk you through their best work. To find the right fit, you need to go off-script. Ask them: Walk me through your worst project.

A top-tier designer will tell you about a time they failed, what the data showed them, and how they pivoted. This reveals their product design strategy. It shows you if they have the humility to learn and the grit to fix things when they break.

The Story of Brian Chesky and the “Designer Founder”

When Brian Chesky and Joe Gebbia started Airbnb, they were designers. However, they didn’t just focus on making a pretty website. In the early days, they realized the business was failing because the photos of the apartments were terrible.

They didn’t just “redesign the UI.” They rented a camera, flew to New York, and took professional photos themselves. They treated design as a solution to a business problem (trust), not just a visual upgrade.

If you are a founder who can’t design, you need to hire someone who thinks like Chesky—someone who views design as a tool to achieve a business goal, not just an art project.

The Price of “Cheap” Design

Finally, let’s talk about compensation psychology. Many founders try to save money by hiring junior designers to do senior-level strategy.

Underpaying for design leads to “mediocre execution.” You might get a product that looks like a 10/10, but if the user flow is a 2/10, your churn rate will skyrocket. It is cheaper to hire one expensive designer who gets the process right than to hire three cheap designers who build something nobody can use.

4. Image Prompt (For “The Portfolio Trap” section)

A visual metaphor of an iceberg. The tip of the iceberg above water is labeled “The Portfolio (UI).” The massive part of the iceberg underwater is labeled “The Process (Research, Logic, Testing, Strategy).” This represents the depth required for a successful hire. Modern, clean 3D render.

Also Read: Beyond the Grid: Why Design is Breaking Free from Systems and Dashboards

RPS // Blogs // Beyond the Grid: Why Design is Breaking Free from Systems and Dashboards
Beyond the Grid: Why Design is Breaking Free from Systems and Dashboards

For the last decade, the world of UX/UI design has been obsessed with “the machine.” We fell in love with the efficiency of atomic design, the rigid predictability of 12-column grids, and the dopamine-chasing complexity of the “God-view” dashboard.

We built massive design systems to ensure every button looked identical, and we crammed every available data point into charts and graphs, assuming that more information equaled a better experience.

But a shift is happening. The era of the “system-first” approach is peaking, and in its wake, we are seeing the return of something we almost forgot: Humanity.

The Death of the Dashboard

The dashboard was once the ultimate status symbol of software. If your app had a screen with twenty different widgets, line graphs, and pie charts, it was “powerful.”

However, users are exhausted. They don’t want to be data analysts just to manage their daily tasks. They don’t want to navigate a cockpit of information; they want answers. We are moving away from Information Density toward Actionable Intimacy.

The new wave of design doesn’t ask the user to find the insight; it delivers the insight through natural language and contextual interfaces.1 Instead of a dashboard showing a 15% drop in engagement, the “quiet” UI simply suggests: “Your community is a bit quiet today; would you like to start a conversation with these three members?”

The dashboard is dying because it’s a barrier between the user and their goal. The future is a single, clear path.

The Design System Trap

Design systems were supposed to set us free. By automating the mundane, designers were meant to focus on “big picture” problems. Instead, many designers became librarians—managing documentation, debating border radii, and ensuring that everything felt consistent to the point of being sterile.

When every app uses the same rounded corners, the same inter-font, and the same “neutral-600” gray, we lose the soul of the product. Branding has been sacrificed at the altar of “usability,” resulting in a web that looks like one giant, endless template.

The “Quiet Human” movement is a rebellion against this sameness. It’s about reintroducing personality, intentional imperfection, and high-fidelity craft that doesn’t always fit perfectly into a React component library.

The Rise of Quiet, Intentional UX

So, what does it mean for design to become “quietly human” again? It manifests in three major shifts:

1. Anticipatory, Not Reactive

Instead of giving users a toolbox (the system) and telling them to build something, we are designing software that anticipates needs.2 It feels less like a machine and more like a helpful assistant who knows when to speak and when to stay silent.

2. Narrative Interfaces

We are moving away from “screens” and toward “stories.” Modern UI is beginning to mirror the way humans actually communicate—through flow, conversation, and gradual discovery. The rigid hierarchy of the sidebar and header is being replaced by organic, fluid layouts that adapt to the user’s emotional state.

3. Emotional Ergonomics

We’ve spent years perfecting physical ergonomics and digital accessibility, but we’re only now starting to value emotional ergonomics. This is design that respects a user’s mental bandwidth. It uses whitespace not just for “cleanliness,” but for breathing room. It uses color not just for “conversion,” but for mood.3

The Path Forward: Designing for the Soul

The “End of Dashboards” isn’t literally about deleting data displays; it’s about the end of the dashboard mindset. It’s a move away from treating users as data-processing units.

As AI takes over the heavy lifting of generating layouts and maintaining systems, the role of the designer is shifting.4 Our value no longer lies in how well we can organize a Figma file. Our value lies in our empathy, our taste, and our ability to make technology feel less like a cold tool and more like a warm extension of the human experience.

The future of design isn’t a system. It’s a feeling. And it’s finally getting quiet enough for us to hear it.

Also Read: How Successful SaaS Companies Make Design Decisions (Without Committee)

RPS // Blogs // How Successful SaaS Companies Make Design Decisions (Without Committee)
How Successful SaaS Companies Make Design Decisions (Without Committee)

The Meeting That Should Never Have Happened

Stewart Butterfield founded Slack in 2013, but the company nearly died three years later.

Not because the product was bad. Because the decision-making had become broken.

By 2016, Slack had 50 employees. They were adding features fast. But something felt wrong.

Every design decision took weeks. A button color would go to committee. Ten people would have opinions. Meetings would happen. Nothing would change until someone got frustrated and decided unilaterally.

The product felt disjointed. Features weren’t cohesive. The interface was becoming a patchwork of decisions made by different people at different times.

Stewart realized the problem: they were making design decisions by committee.

A committee means everyone has a say. Everyone has equal voice. That sounds fair. It’s actually the path to mediocrity.

Committee design creates products where no decision is strong. Everything is compromised. Nothing is excellent.

Stewart made a decision that changed everything: he removed design decisions from committee.

Instead, he created a process. One person decided. Other people could challenge the decision. But the decision was made by one person, not consensus.

The results were immediate. Features shipped faster. The product felt coherent. The design improved.

Why Committee Design Fails

Committee design sounds like it should work. More voices. More perspectives. Better decisions.

In reality, it’s the opposite.

A committee design decision works like this:

A designer proposes a solution. The product manager suggests a different approach. The engineer raises concerns. The founder has opinions. The marketing person wants something different.

Everyone talks. Nobody decides.

Or someone decides unilaterally. But now half the team disagrees. They’re less invested. They implement half-heartedly.

Or the decision gets compromised. Everyone’s opinion gets incorporated. The result is incoherent.

None of these outcomes are good.

Committee design kills velocity. It kills coherence. It kills ownership.

How Slack Actually Made Design Decisions

Stewart created a simple framework for making design decisions without committee.

Step 1: The Proposer

One person proposes a design. This person is responsible for the proposal. They’ve thought it through. They can defend it.

This person might be the designer. Might be the product manager. Might be anyone. But it’s one person.

Step 2: The Context

The proposer explains the context. Why are we making this decision? What problem are we solving? What did we consider and reject?

Context matters because it helps others understand the reasoning.

Step 3: The Feedback Window

Other people can provide feedback. But feedback is just input. Not votes.

The designer listens to feedback. But they’re not obligated to take it.

Step 4: The Decision

The proposer decides. Based on their judgment. Based on feedback. But ultimately their call.

Step 5: The Commitment

Once decided, the team commits. Even people who disagreed.

If the decision is wrong, you’ll learn. You’ll reverse it. But you don’t second-guess it while implementing.

This process sounds simple. It’s revolutionary.

Why? Because one person is accountable.

If the decision is good, they get credit. If it’s bad, they own it.

Accountability changes how people think about decisions.

Why This Works

The reason this framework works is psychological.

When you’re one of five people deciding something, you’re 20% responsible.

If it fails, you can blame the others. “I wanted something different.”

When you’re the person deciding, you’re 100% responsible.

If it fails, it’s on you.

This creates different incentives.

A committee member might suggest a conservative choice because it’s safe.

A person making the decision might suggest a better choice because they own the outcome.

Stewart realized this. He structured Slack’s decision-making around individual accountability, not consensus.

The Real Impact on Product Quality

By 2018, Slack’s design felt cohesive. Features worked together. The interface was intuitive.

Not because the design was perfect. But because decisions were made by people who owned them.

A designer made a button color decision. It was her decision. If it was wrong, she’d change it.

This accountability meant she thought carefully. She wasn’t making arbitrary choices.

The product manager made a feature priority decision. It was her decision. If it backfired, she’d explain why.

This accountability meant she prioritized thoughtfully.

The difference between Slack’s 2016 version (committee decisions) and 2018 version (individual accountability) was night and day.

Not because the people changed. But because the decision structure changed.

How Different Companies Apply This

Not every company uses Slack’s exact framework. But successful SaaS companies use the principle: design decisions are made by individuals, not committees.

Company 1: The Design Lead Model

One design lead makes all design decisions.

Other people give input. But the design lead decides.

This works when you have a strong design lead.

Examples: Stripe uses this model in many areas. Strong design leadership. Coherent product.

Company 2: The Product Manager Model

The product manager decides.

They consult designers, engineers, and data. But they decide.

This works when product managers think holistically about user experience.

Examples: Some SaaS companies use this. The best ones have product managers who understand design deeply.

Company 3: The Founder Model

The founder decides, especially in early days.

This works when the founder has strong taste.

Examples: Apple under Steve Jobs famously used this. Figma’s founder Dylan Field makes many design decisions.

Company 4: The Data Model

Design decisions are made by looking at data.

A/B test shows one design performs better. That design wins.

This removes opinion from decisions.

Examples: Some SaaS companies use this heavily. Conversion-focused companies especially.

The Key Elements of Each Successful Model

All successful models share common elements:

Element 1: Clear Ownership

Someone is clearly responsible for the decision.

Not “the team,” not “we.” But “Sarah decided,” or “the design lead decided.”

Element 2: Input Gathering

Even though one person decides, they gather input from others.

They’re not deciding in isolation.

Element 3: Clear Criteria

The decider explains what they’re optimizing for.

“We’re optimizing for new user clarity, not power user efficiency.”

This helps others understand why a decision was made.

Element 4: Reversibility

If a decision is wrong, you can reverse it.

This reduces the risk of individual decision-making.

A bad button color can be changed. A bad feature can be disabled.

Element 5: Speed

Individual decisions are made faster than committee decisions.

No meetings. No consensus-building. One person decides.

The Common Mistake Companies Make

Most companies start with individual decision-makers.

The founder decides everything. Works great early on.

As the company grows, people push back. “Why does one person decide for all of us?”

The company adds more people to decisions. “Let’s make it more democratic.”

This feels more inclusive. Everyone has a voice.

But the product suffers. Decisions slow down. Coherence breaks.

Most failed companies didn’t fail because of bad decisions. They failed because of slow decisions.

By the time a decision was made, the market had moved.

Stewart understood this. He stayed committed to individual decision-making even as Slack grew.

How to Know If Your Decision-Making Is Broken

Ask yourself these questions:

Question 1: How long does a design decision take?

If it takes weeks, something’s wrong.

A good design decision should take days, not weeks.

If it takes weeks, you probably have committee decision-making.

Question 2: Do decisions feel compromised?

You make a decision that nobody’s fully happy with.

That’s a sign of committee compromise.

Good decisions are strong. People might disagree, but they understand why the decision was made.

Question 3: Does the product feel coherent?

Do different parts feel like they’re made by different people?

If yes, your decision-making is fragmented.

Good products feel unified. Even if they’re built by different teams.

Question 4: Can people execute quickly?

Once a decision is made, can the team execute in days?

Or do they re-discuss and reconsider?

If they re-discuss, ownership is unclear.

Question 5: Are people invested in the outcomes?

When a decision is made, do people own the result?

Or do they think “I didn’t want this but whatever”?

If it’s the latter, decision-making isn’t clear.

How to Actually Change Your Decision-Making

If your company has committee decision-making, here’s how to fix it:

Step 1: Pick One Area

Don’t change your entire decision-making process at once.

Pick one area. Maybe design. Maybe features. Maybe navigation.

Step 2: Designate a Decision-Maker

For that area, one person decides.

This person has authority. They listen to input. But they decide.

Step 3: Set Clear Criteria

This person explains what they’re optimizing for.

“I’m optimizing for new user clarity” or “I’m optimizing for power user speed.”

Step 4: Make Decisions Fast

This person makes decisions in days, not weeks.

No extended meetings. No consensus-building.

Step 5: Measure the Impact

Track whether this area improves.

Is the product better? Are decisions faster? Are people more invested?

Step 6: Expand

If it works, expand this model to other areas.

Don’t try to change everything at once.

The Fear People Have

When you suggest individual decision-making, people get nervous.

“What if one person makes bad decisions?”

It’s a fair question.

Stewart’s answer: if they make bad decisions, they won’t be the decision-maker for long.

Bad decision-makers become obvious quickly.

If someone makes three bad decisions in a row, they lose credibility.

The organization naturally shifts power to better decision-makers.

This is different from committee decision-making, where bad decisions get buried in consensus.

Individual decision-making makes bad decisions visible.

This is actually good. It creates pressure to improve.

The Role of Feedback

Feedback in this model is important. But different than in committee models.

In committee models, feedback is voting. People vote for their preference.

In individual models, feedback is input. The decision-maker considers it, but doesn’t have to follow it.

This is a crucial difference.

A designer makes a button color decision: orange.

A colleague says “I think blue is better.”

In committee: there’s a vote. One side wins, one side loses.

In individual: the designer considers it. Maybe they agree. Maybe they don’t. They decide.

The colleague has been heard. But the decision-maker decided.

This is psychologically different. It feels less fair. But it’s more effective.

How Stewart’s Model Affected Slack’s Growth

By 2017, Slack’s design was notably cohesive.

New features fit naturally into the existing product.

The interface was intuitive. Users didn’t have to learn new patterns.

This coherence had massive business impact.

New user onboarding improved. Retention improved. Feature adoption improved.

By 2019, Slack went public. Part of the investment thesis was “this product is beautifully designed.”

The design quality wasn’t accidental. It came from how decisions were made.

Strong design required strong decision-making.

Different Models for Different Company Sizes

The model changes as companies grow.

Early Stage (5-20 people)

The founder decides most things.

This is fine. Founders have taste. They move fast.

Growth Stage (20-100 people)

Multiple decision-makers emerge.

The design lead decides design. The product manager decides features. The founder decides strategy.

Clear areas of authority.

Scale Stage (100+ people)

Decision-making frameworks become more formal.

But the principle stays: one person decides in their area.

Committees are used for truly company-wide decisions, not day-to-day decisions.

Data-Driven Decisions

There’s one area where committees can work: data-driven decisions.

If you A/B test two designs and one clearly performs better, you use the better one.

The data decides. Not people.

This removes ego from decisions.

Slack uses this for some decisions. “We tested three button colors. This one had the highest click rate.”

That’s objective. Data wins.

But most design decisions aren’t data-driven. They’re judgment calls.

For judgment calls, individual decision-makers work better.

The Real Lesson

Stewart’s insight wasn’t “remove all input from decisions.”

It was “don’t confuse input with decision-making.”

Input is valuable. Feedback is valuable. Other perspectives are valuable.

But input should inform the decision, not make the decision.

The decision-maker listens to input. Then decides.

This is different from voting where input IS the decision.

Most failing companies have confused these two.

They treat input as votes.

Successful companies treat input as information.

What This Means for Your Product

If your product feels disjointed, your decision-making is probably disjointed.

If your product feels coherent, your decision-making is probably clear.

If you’re shipping features slowly, committee decision-making is probably slowing you down.

If you’re shipping quickly, someone is probably making decisions clearly.

The product is a mirror of how decisions are made.

This Week

Pick one small design decision you need to make.

Instead of bringing it to committee, make it yourself.

Gather input. Consider it. Then decide.

See how long it takes.

See how the team reacts.

See if the outcome is good or bad.

If it’s good and fast, expand this approach.

If it’s bad, you’ve learned something valuable about yourself as a decision-maker.

Either way, you’ve broken the committee cycle.

That’s how change starts.

Also Read: Figma Shortcuts Every SaaS Designer Should Know (That Save Hours Weekly)

RPS // Blogs // Figma Shortcuts Every SaaS Designer Should Know (That Save Hours Weekly)
Figma Shortcuts Every SaaS Designer Should Know (That Save Hours Weekly)

The Designer Who Got Tired of Clicking

Dylan Field founded Figma in 2012 with a vision: make design collaboration easy.

What most people don’t know is that Dylan became obsessed with one thing: eliminating unnecessary clicks.

In the early days, Dylan would watch designers use Figma. He noticed something that bothered him. Designers spent 30-40% of their time doing repetitive tasks. Clicking the same buttons. Typing the same text. Creating variations of the same component.

These weren’t creative moments. These were mechanical moments. Time wasted.

Dylan made a decision: Figma would be built around shortcuts. Keyboard shortcuts. Workflow shortcuts. Automation shortcuts.

The idea was simple: reduce the time designers spend on mechanical tasks so they can spend more time on thinking.

Over the years, Figma accumulated hundreds of shortcuts. Most designers know maybe 10 of them. The rest are hidden away, waiting to save time.

Dylan’s insight applies to every SaaS designer: the difference between a designer who finishes work in eight hours and one who finishes in four hours isn’t talent. It’s knowing the tools inside out.

Why Shortcuts Matter More Than You Think

A designer who knows Figma shortcuts saves 10-15 hours per week.

That’s not an exaggeration. That’s based on how much time designers spend on repetitive tasks.

Let’s do the math. A SaaS designer works 40 hours per week. Of those:

About 35% of time is spent on actual design thinking (strategy, research, deciding what to build).

About 40% of time is spent on execution (building components, creating layouts, making variations).

About 25% is spent on collaboration and communication.

Of the 40% execution time, most is repetitive. Copying components. Creating variations. Adjusting spacing. Duplicating elements.

If you know shortcuts, you cut that execution time from 16 hours to 6 hours per week.

That’s 10 hours back. That’s a quarter of your week.

In a year, that’s 500 hours. That’s three months of work.

A shortcut that saves 30 seconds per task, repeated 100 times per week, saves 50 hours per year.

This is why Dylan obsessed over shortcuts. It’s not about being fast. It’s about getting your time back for work that matters.

The Shortcuts That Actually Save Time

Not all shortcuts are created equal. Some save five seconds. Some save five minutes.

The ones worth learning are the ones you’ll use dozens of times per day.

Shortcut 1: Duplicate (Ctrl+D or Cmd+D)

Every designer knows this one. Select something. Press Cmd+D. It duplicates.

But most designers don’t know where duplicates appear. They appear exactly where you expect: directly on top of the original, offset slightly.

This matters because you can duplicate something five times and each duplicate is stacked on top, offset. You can see all of them.

Why this saves time: Instead of copy-paste-paste-paste, you press one key. Instead of arranging duplicates, Figma arranges them for you.

A designer creating five button variations uses this 50 times per day. That’s 50 keypresses instead of 200 mouse clicks.

Shortcut 2: Create Component (Cmd+K)

Creating a component is the foundation of efficient design.

A component is a reusable element. You create it once. You use it 100 times.

Change the component once. All 100 instances update automatically.

Most designers know components exist. Most don’t know the shortcut to create them.

They right-click, look for the menu option, create component that way.

Cmd+K is faster.

Why this saves time: You’re not digging through menus. You’re pressing one key.

But the real time savings is bigger. When you have proper components, you spend 60% less time on repetitive variations.

Shortcut 3: Select All with Same Properties (Double-click a property)

Select a button. It’s 48px tall, blue color, Roboto font.

Now you want to find all buttons that are 48px tall and change them to 56px.

Without this shortcut, you’d have to select each one individually.

With this shortcut, you double-click the 48px height property. Figma selects all elements with that height.

Then you change the height to 56px. All of them update.

Why this saves time: You’re not manually selecting dozens of elements. Figma does it for you.

Shortcut 4: Rename Layers Quickly (Double-click layer name)

Figma layers are how you organize your design.

A messy layer panel means you can’t find anything.

Most designers ignore layer naming. They end up with “Frame 1,” “Rectangle 5,” “Group 3.”

Good designers name layers properly. But naming takes time.

Double-click a layer name. It becomes editable. Type the new name. Press Enter.

This is faster than right-click, rename, enter new name.

Why this saves time: You spend less time searching for layers because they’re organized.

This compounds. Over a year, you save hundreds of hours just from finding things faster.

Shortcut 5: Component Swap (Hold Alt, hover over a component)

Imagine you have 50 instances of a button component in your design.

Now you realize you should use a different button style.

Without this shortcut, you’d have to delete each button and create new ones.

With this shortcut, you hold Alt and hover over another button component. Your current button swaps to that one.

You can do this for all 50 buttons in minutes.

Why this saves time: You’re not recreating work. You’re swapping it.

This is especially powerful when you’re iterating. You can quickly try different components and see which works best.

Shortcut 6: Auto Layout (Shift+A)

Auto Layout is a feature that automatically arranges elements.

You select multiple buttons. Press Shift+A. Figma arranges them in a row or column with consistent spacing.

When you change one button’s size, the others adjust automatically.

Without Auto Layout, you’d manually space every element.

Change one element’s size? You’d have to manually adjust everything else.

Why this saves time: You’re not manually spacing 20 buttons. Auto Layout does it.

And when you change one button, everything adjusts. You don’t have to manually fix spacing.

Shortcut 7: Copy Properties (Right-click, Copy Properties)

You have a button that’s styled perfectly. Text color, button color, shadow, everything.

Now you have another button that you want to style the same way.

Without this shortcut, you’d manually recreate all the styling.

With this shortcut, you copy properties from the first button and paste them onto the second.

Why this saves time: You’re not manually styling elements. You’re copying styling.

This is powerful when you’re making variations of components. You create the style once. Copy it 10 times. Done.

Shortcut 8: Lock/Unlock (Cmd+Shift+L)

When you’re designing a complex layout with many elements, sometimes you accidentally move things.

You lock elements you don’t want to change. They become unmovable.

Most designers unlock elements by right-clicking and selecting unlock.

Cmd+Shift+L toggles lock faster.

Why this saves time: You’re not right-clicking repeatedly. You’re pressing one key.

This matters when you’re working on intricate details and don’t want to accidentally move background elements.

The Workflow Shortcuts That Change How You Work

Beyond individual shortcuts, there are workflow patterns that save enormous time.

Pattern 1: The Variation Workflow

You’re designing a button. It has hover, active, disabled states.

Instead of designing from scratch each time, you:

  1. Create the base button
  2. Duplicate it (Cmd+D)
  3. Rename it “Button – Hover”
  4. Adjust the styling
  5. Duplicate again, rename “Button – Active”
  6. Make it a component (Cmd+K)
  7. Create component variants

With shortcuts, this takes 5 minutes. Without them, it takes 20 minutes.

The time difference is that you’re not digging through menus. You’re pressing keys.

Pattern 2: The Copy Component Styling Workflow

You have a perfect button component. You need a secondary button that’s similar but slightly different.

  1. Duplicate the button component (Cmd+D)
  2. Rename it
  3. Right-click, select “Copy Properties” from the original
  4. Right-click the new one, “Paste Properties”
  5. Adjust only the colors

Without this pattern, you’d recreate styling from scratch.

With this pattern, you copy styling and change only what’s different.

Pattern 3: The Batch Update Workflow

You have 30 buttons throughout your design.

The designer decides all buttons should have more spacing inside.

You select one button. You note its padding (12px).

You double-click the 12px padding property. All buttons with 12px padding select.

You change to 16px. All 30 update.

Without this workflow, you’d change each button individually.

With this workflow, you change them all in seconds.

The Hidden Shortcuts Nobody Talks About

Most designers know the obvious shortcuts. The hidden ones are where real time savings happen.

Hidden Shortcut 1: Shift+Number Keys to Change Opacity

Select an element. Press Shift+5. Opacity becomes 50%.

Press Shift+8. Opacity becomes 80%.

Most designers use the opacity slider (finding it, clicking it, dragging it).

With this shortcut, you press one key and move on.

Why it matters: You adjust opacity dozens of times per day. This is faster every single time.

Hidden Shortcut 2: Cmd+B to Bold Text

You’re adjusting typography. You want to make text bold.

Most designers click the bold button or use the font dropdown.

Cmd+B toggles bold instantly.

This is the same shortcut every word processor uses. Figma supports it.

Hidden Shortcut 3: Cmd+I to Italicize Text

Same as bold. Cmd+I italicizes text instantly.

Hidden Shortcut 4: Alt+Drag to Duplicate and Position

Select an element. Hold Alt and drag.

Instead of moving the element, you’re dragging a duplicate.

This is faster than duplicate-paste-position.

Why it matters: When you’re arranging elements, this is instant.

Hidden Shortcut 5: Cmd+] and Cmd+

Layers in Figma have a stacking order. Sometimes you want to bring something forward or send it back.

Most designers right-click and select “Bring Forward” or “Send Back.”

Cmd+] brings forward. Cmd+

This is instant.

Hidden Shortcut 6: Cmd+Enter to Finish Editing

When you’re editing text or a layer name, pressing Cmd+Enter confirms the change.

Instead of clicking away or pressing Tab, you press Cmd+Enter.

This sounds tiny. But you do this dozens of times per day.

Hidden Shortcut 7: / to Search for Tools

Instead of clicking the toolbar, you press / and search for what you need.

Type “text” and the text tool activates.

Type “hand” and the hand tool (for panning) activates.

This is faster than clicking.

Hidden Shortcut 8: Shift+2 to Zoom to Fit

You’re zoomed in on details. You want to see the whole canvas.

Shift+2 zooms to fit the selection or page in the viewport.

Most designers use the menu or zoom dropdown.

This is instant.

How Dylan’s Philosophy Changed Design Work

Dylan’s obsession with shortcuts came from one belief: designers should be thinking, not clicking.

Every click takes time. Every menu takes time. Every decision point takes time.

The best design tool gets out of the way.

Figma did this by building shortcuts into everything.

Modern SaaS designers who’ve grown up with Figma expect this. They expect keyboard shortcuts for everything.

This expectation changed what good tools look like.

The Real Time Savings

Let me give you specific numbers from real SaaS designers who use these shortcuts.

A designer at a Series B SaaS company tracked their time before and after learning Figma shortcuts.

Before learning shortcuts:

  • Creating a button with five states: 25 minutes
  • Creating variations of a component: 40 minutes
  • Updating all instances of a component after design change: 30 minutes
  • Total per day: 8-10 hours of work

After learning shortcuts:

  • Creating a button with five states: 8 minutes
  • Creating variations of a component: 12 minutes
  • Updating all instances after design change: 3 minutes
  • Total per day: 4-5 hours of work

The difference is 4-5 hours per day.

That’s 20-25 hours per week.

That’s 100+ hours per month.

The designer went from shipping 8 designs per month to shipping 16 designs per month.

All from knowing shortcuts.

How to Actually Learn These

Knowing shortcuts and using shortcuts are different things.

You can’t memorize 50 shortcuts. You’ll forget most of them.

The strategy is to learn three at a time.

Learn one shortcut. Use it 100 times. It becomes muscle memory.

Then learn the next one.

Over three months, you’ll have learned 10-15 shortcuts that matter.

That’s enough to transform your workflow.

Week 1: Learn Cmd+D (duplicate) and Cmd+K (make component)

These two alone will save hours.

Every time you need to duplicate, use Cmd+D instead of copy-paste.

Every time you need a component, use Cmd+K instead of the menu.

Week 2: Learn Cmd+Shift+L (lock/unlock) and Alt+Drag (duplicate and position)

Once duplicating is muscle memory, learn these.

Week 3: Learn Shift+Number Keys (opacity) and / (search tools)

These are smaller but compound with the others.

By week 3, you’re using five shortcuts constantly.

Your workflow is noticeably faster.

The Mistake Most Designers Make

Most designers learn Figma by learning features.

“Here’s how to use Auto Layout.” “Here’s how to create components.”

They learn the concept. They forget the shortcut.

Then they use the menu every time.

The fast designers learn the shortcut first. They use it so much it becomes automatic.

Then they understand the feature deeply because they use it constantly.

The order matters.

Why SaaS Designers Specifically Need This

SaaS designers create components constantly.

They iterate. They create variations. They update components across screens.

A designer working on a marketing website might design 10 components.

A SaaS designer designs 100 components.

The time savings from shortcuts compounds for SaaS designers.

Shortcuts that save 30 seconds per task, done 500 times per week, save 250 hours per year.

That’s three months of work.

For SaaS designers, shortcuts aren’t optional. They’re required to ship fast.

The Tools That Work With Figma Shortcuts

Figma has plugins that amplify shortcuts.

Evernote’s Figma plugin lets you export designs to Evernote with keyboard shortcuts.

Notion’s plugin exports designs to Notion instantly.

These don’t replace shortcuts. They extend them.

But the core shortcuts matter most.

What Dylan Would Tell You

Dylan Field’s philosophy about design tools is: the tool should disappear.

When you’re designing, you shouldn’t be thinking about the tool. You should be thinking about the design.

Every time you’re clicking a menu or searching for a button, the tool is getting in the way.

Shortcuts eliminate that friction.

A designer using shortcuts is in flow. They think of something, they execute it instantly.

A designer using menus is interrupted. They think of something, they search for it, they execute it.

The difference is huge over time.

This Week

Pick one shortcut. Just one.

Learn Cmd+D (duplicate).

Use it instead of copy-paste for the next week.

Count how many times you use it.

Multiply by the time it saves per use.

You’ll be shocked at the total.

Next week, learn Cmd+K (make component).

In four weeks, you’ll have four shortcuts that save hours weekly.

In a year, you’ll be 50% faster at design execution.

That’s the compounding power of shortcuts.

Dylan built Figma around this idea.

The designers winning today are the ones who understand it.

Also Read: 5-Minute Design Audit – One Framework That Works Every Time